Light therapy facials have gained immense popularity in recent years, with many people experiencing remarkable improvements in skin texture, acne reduction, and anti-aging benefits. While professional LED facials can be expensive, you can now achieve salon-quality results at home with a DIY light therapy facial.
However, using LED light therapy at home requires proper knowledge and safe practices to maximize benefits while avoiding risks. In this guide, we will cover:
✅ The science behind light therapy facials
✅ Step-by-step guide for a DIY light therapy session
✅ Best practices and safety tips
✅ Why Light Therapy Facial-X7 is the best device for at-home treatments
Understanding Light Therapy for Skin
LED light therapy works by using specific wavelengths of light to penetrate the skin at different depths, promoting various benefits:
🔵 Blue Light (415 nm) – Targets acne-causing bacteria and reduces inflammation.
🔴 Red Light (630–660 nm) – Stimulates collagen production and reduces fine lines.
🟢 Green Light (525 nm) – Helps with hyperpigmentation and evens skin tone.
🟡 Yellow Light (590 nm) – Improves blood circulation and reduces redness.
🌈 Near-Infrared Light (850 nm) – Reaches deeper layers for enhanced healing and skin regeneration.
The Light Therapy Facial-X7 combines multiple light wavelengths to provide a customized facial treatment suitable for all skin types.
Step-by-Step Guide: DIY Light Therapy Facial
Follow this step-by-step process to achieve flawless skin at home using Light Therapy Facial-X7 or any other LED device.
Step 1: Cleanse Your Skin Thoroughly
Begin by removing makeup, dirt, and excess oil from your face. Use a gentle cleanser to ensure your skin is free from impurities, allowing light therapy to penetrate effectively.
💡 Pro Tip: Use a micellar water-based cleanser for deep cleansing.
Step 2: Exfoliate (Once a Week)
Exfoliation helps remove dead skin cells, allowing LED light to reach deeper layers of the skin.
- For sensitive skin: Use a mild enzyme exfoliator.
- For oily/acne-prone skin: Try a salicylic acid-based exfoliant.
🚨 Avoid over-exfoliating! Once a week is enough before light therapy.
Step 3: Apply a Hydrating Serum (Optional)
Some serums enhance light penetration and boost skin hydration. If your device allows, apply a serum with hyaluronic acid or niacinamide before the session.
🌿 Best Serums for Light Therapy:
✅ Hyaluronic Acid – Deeply hydrates and plumps the skin.
✅ Niacinamide – Helps with redness and inflammation.
✅ Peptides – Stimulates collagen production.
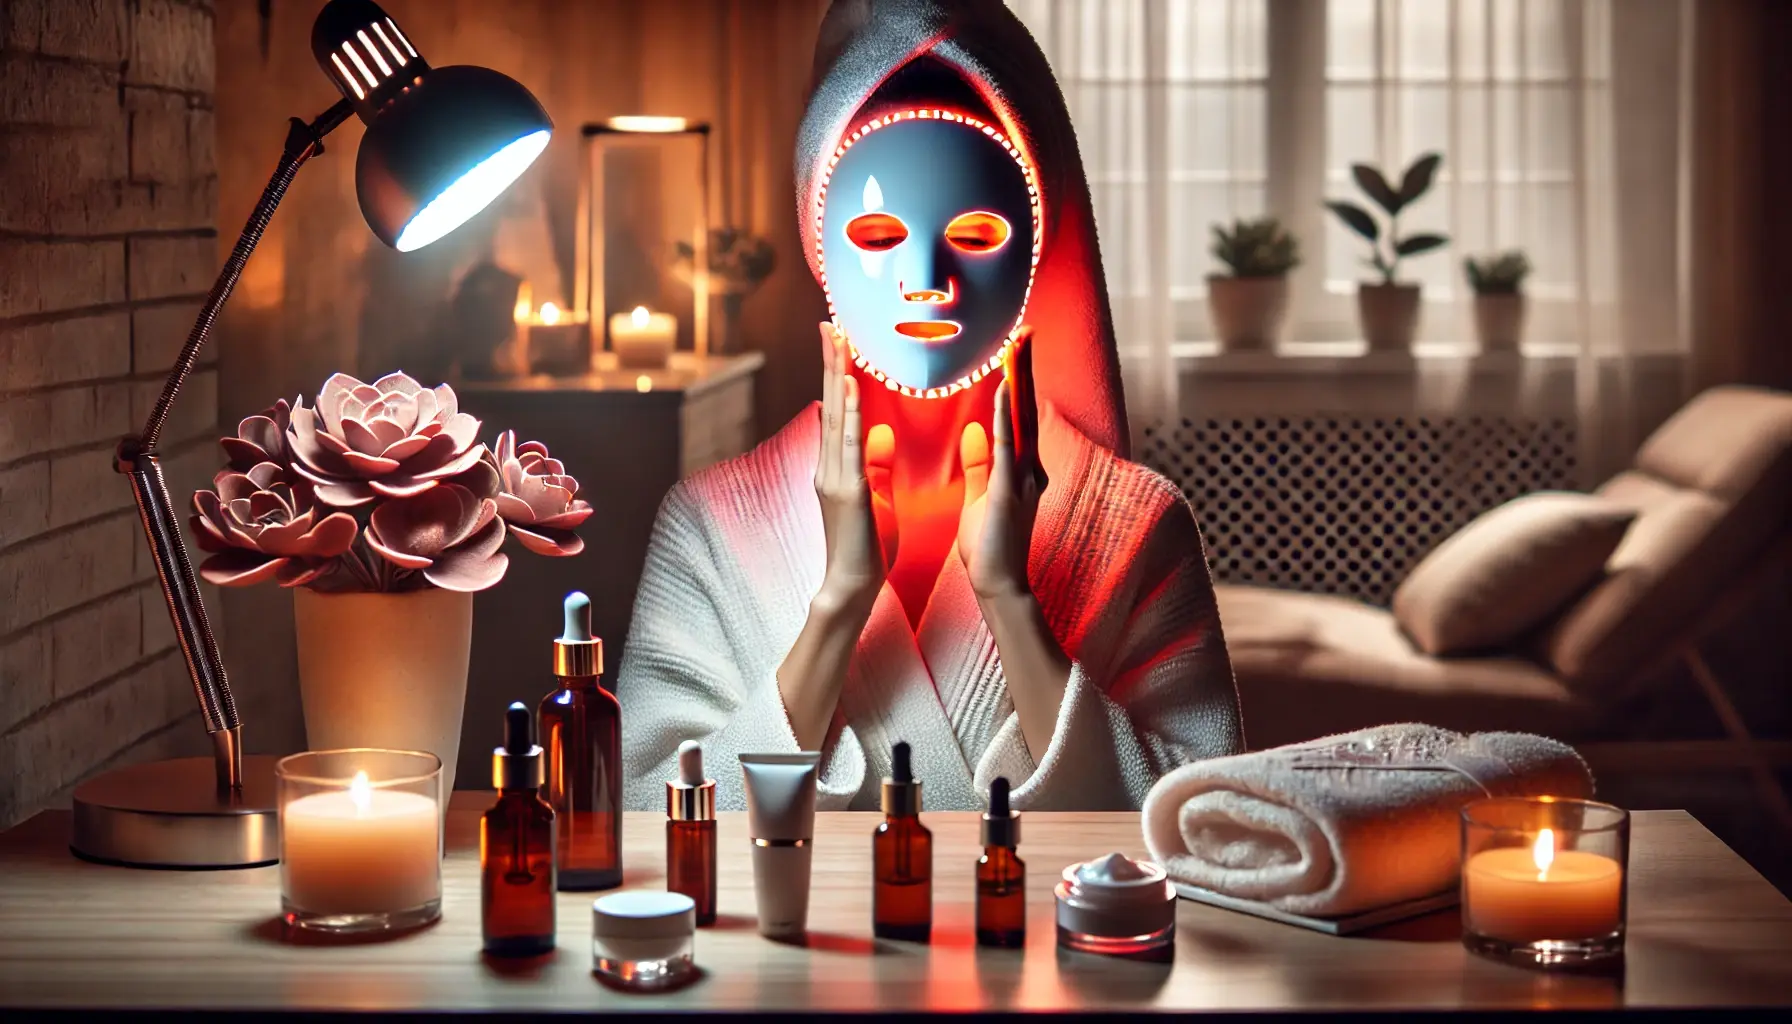
Step 4: Use the Light Therapy Facial-X7
Now, it’s time to use the Light Therapy Facial-X7 device! Follow these instructions for the best results:
✅ How to Use the Light Therapy Facial-X7:
1️⃣ Select the right light setting based on your skin concern.
2️⃣ Wear protective goggles (especially for blue and red light therapy).
3️⃣ Hold the device 1-2 inches away from your skin or wear the LED mask.
4️⃣ Use for 10-20 minutes, depending on your skin type and concern.
5️⃣ Repeat 3-5 times a week for optimal results.
💡 Pro Tip: Consistency is key! Use Light Therapy Facial-X7 regularly for visible results.
Step 5: Apply a Moisturizer & Sunscreen
After completing your light therapy session:
- Moisturize your skin to lock in hydration.
- Always apply sunscreen (SPF 30+) during the daytime.
🚨 Why Sunscreen is Important?
LED therapy increases skin sensitivity, making it essential to protect your skin from UV damage.
Safe Practices & Tips for DIY Light Therapy
✅ Do not overuse – Stick to recommended time settings to avoid irritation.
✅ Choose the right light color – Red for anti-aging, blue for acne, green for pigmentation.
✅ Clean your device regularly – Avoid bacteria buildup by disinfecting after each use.
✅ Use protective goggles – Especially for blue and red light treatments.
✅ Be patient – LED therapy takes a few weeks to show noticeable improvements.
🚨 Who Should Avoid Light Therapy?
- People with epilepsy or light sensitivity disorders.
- Those taking photosensitive medications (e.g., acne medications like Accutane).
- If you have active skin infections or open wounds, consult a dermatologist first.
Why Choose Light Therapy Facial-X7?
If you're looking for the best at-home LED therapy device, the Light Therapy Facial-X7 stands out because of its:
🔥 Multi-Wavelength Technology – Red, Blue, Green, and Infrared in one device!
🔥 Clinically Proven Results – Designed by skin experts for maximum effectiveness.
🔥 Adjustable Intensity Settings – Perfect for sensitive, acne-prone, or aging skin.
🔥 Lightweight & Comfortable – Use it hands-free while relaxing!
🔥 Safe & FDA-Approved – No harmful UV rays, 100% safe for all skin types.
📢 Special Offer: Get 20% Off Your Light Therapy Facial-X7 Today!
👉 Click Here to Order Now
Frequently Asked Questions (FAQ)
Q1: How often should I use Light Therapy Facial-X7?
A: For best results, use 3-5 times a week for 10-20 minutes per session.
Q2: How long does it take to see results?
A: Most users notice improvements in 4-6 weeks with consistent use.
Q3: Can I use LED light therapy on sensitive skin?
A: Yes! Start with low-intensity settings and gradually increase if needed.
Q4: Does LED therapy hurt?
A: No! It’s painless, non-invasive, and completely safe for home use.
Final Thoughts: Glow Up with DIY Light Therapy!
Light therapy facials are a game-changer in skincare, offering anti-aging, acne-fighting, and skin-rejuvenating benefits in the comfort of your home.
By following this guide and using the Light Therapy Facial-X7, you can achieve radiant, youthful skin without expensive spa treatments!
💡 Ready to transform your skin?
👉 Order Light Therapy Facial-X7 Now!

Leave a comment
Your email address will not be published. Required fields are marked *